Mail Art

Mail art, also known as Correspondence art has become increasingly popular. While there are all sorts of styles of mail art, my favorite of course are the projects that have the "vintage" vibe.  


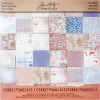
I found these great vintage envelopes in an antique shop and they are my inspiration when creating my mail art note cards. 


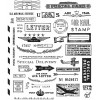
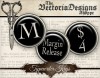
Office stamps work great on mail art. They are the perfect addition to cards and envelopes. Simply Stamps has a special section called "Office Stamps." While these are traditionally for office use, they also work great for greeting cards. Today I am using two stamps from the Stock Office Stamp Section called "Priority" and "First Class."


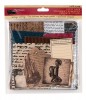
Whenever I start a project, I gather all my supplies that I think would work for the theme I am going for. I may not use everything, but at least I have lots of options when putting my card together. While I have a general idea of what I am going to do, no project is completely set until it becomes glued down on the card stock.

You never know where your inspiration is going to take you, so I don't commit to anything until the very end. 


For your convenience, I have put together a video which shows my process for putting together layered cards. Hopefully it will help you to get your juices flowing and inspire you to create some mail art.


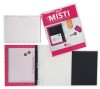
The base designer paper measures 4.25" x 5.5".  I chose to unmount my stamp from the wood block as I wanted to use my MISTI to perfectly position my stamp.  This can also be accomplished with an acrylic block.


From there I just layered various stickers, papers and embellishments. Keep in mind, these embellishments can be in any form that fits the theme. These can be old letters, Post cards and even a page from an old dictionary as I used on my card.


Once I had all my layers in place, I added a metal key using my glue gun and some fabric starts that I had colored up using some distress paint. I also added a few sentiment stickers.


Thanks for stopping by!


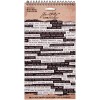
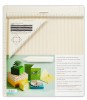
1. Designer Paper - 7gypsies Postale
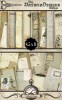
2. I used ephemera from 7gypsies - Mini Etiquettes pack and ART      ephemera Collage kit
3.  Stickers from 7gypsies - Postale collection
4. Rubber stamps - First Class & Priority from Simply Stamps
5. Rubber stamps - Correspondence from Stampers Annonymous
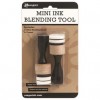
6. Distress paint - Fired Brick
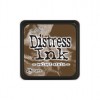
7. Distress ink - Walnut Stain
8. idea-ology - Small Talk


Typography Valentine Card


Who would have thought that old office machines could be so romantic? Well combined with some script paper and a beautiful quote..I made it happen.

Typography is a great way to create vintage inspired Valentine's Day Cards. using printables from VectoriaDesigns, you can spell out whatever endearment you wish to express.


I created the quote using PicMonkey and a font called Adler.  The paper is from 7Gypsies and the date stamps is from Simply Stamps.  To see how I created this card, click on my video above.

I have listed all the items I used to created this card for your convenience.

Thanks for stopping by.


MHKDesigner Inspiration - Key To Success

Hi everyone! Today I am here to share with you  my MHKDesigner inspiration post. I am new to the design team, but hope to bring you some Vintage inspiration every month on my designer spotlight.


The sentiment I am using is from the set The Write Stuff and is available in the  MHKDesigns Etsy Store.


Using Pic Monkey I imported the key and sentiment and printed it out on white card stock.  Using my copic colors I colored in the key and used a die cut to cut out two pieces of paper. I matted both pieces onto some black card stock using some metal brads and added some matching washi tape with keys. I also added some black and white twine.

I then matted my finished piece onto some white card stock. 

Thanks for stopping by!


Cards with Texture

There are so many products out in the market today I often challenge myself to try new mediums in creating my cards.  while Texture paste is often associated with canvas art, I decided to create some texture on one of my Valentine's Day cards.


I started with some heavy cardstock measuring 4.25" x 5.5" and covered it with some Tim Holtz tissue paper using perfect paper adhesive. 

Then I added some Tattered Angels Roses R Red glimmer glam to some texture paste and spread it over my tissue paper using a stencil.


Once it was dry I added my cardstock to some designer paper measuring 4.5" x 6.5".


I cut a heart out of some rust burlap from Canvas Corp Brand and adhered it to my card using perfect paper adhesive.


Once the burlap was dry, I added Tim Holtz Alpha tiles to spell out LOVE. 

As a final touch, I added a bow using some canvas rope and adhered that using a glue gun. 


This is a very simple process, but adds so much texture to a greeting card. I hope you will give it a try. 

Thanks for stopping by. 


Featured Post

Challeng Winners - February & March 2023

   Hello everyone. As you may have noticed, I have been MIA for the last couple of months. Life has been very busy and it has been difficult...